I Tested Peel Board for Tint and Found the Best Way to Achieve a Flawless Window Film Finish
I’ve found that when it comes to achieving a clean, professional tint job, the right tools can make all the difference—and that’s where a Peel Board For Tint comes in. Whether I’m working on a vehicle, a storefront, or another glass surface, this simple yet essential tool helps make the tinting process smoother, more precise, and far less frustrating. In this article, I’ll explore why a Peel Board For Tint matters, what makes it useful, and how it fits into the broader world of tint application.
I Tested The Peel Board For Tint Myself And Provided Honest Recommendations Below

YENHOME 17.5″X118″ Faux Beadboard Wallpaper Peel and Stick White Grey Beadboard Wallpaper for Bathroom Ceiling Removable Wainscoting Peel and Stick Wall Paper No Textured Contact Paper for Cabinets

tiptopcarbon Wallpaper Kit Wallpaper Smoothing Tool Wallpaper Tools for Peel and Stick on Contact Paper Hanging Vinyl Backsplash Window Film
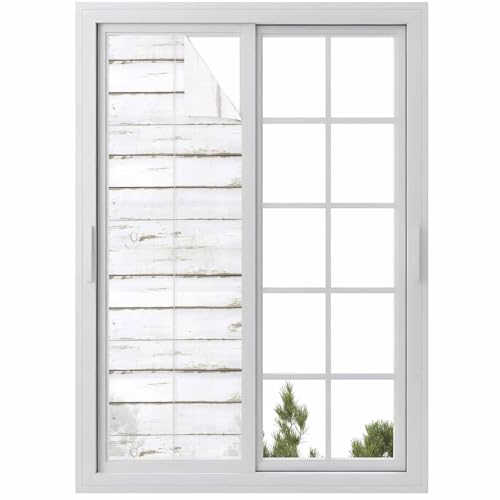
White Wood Grain Window Privacy Film, Window Clings Non-Adhesive Door Cover, Vintage Farmhouse Wooden Board Window Film Decorative, Removable Window Tint for Bathroom/Classroom 17.7″x78.7″

White Wood Grain Window Privacy Film, Vintage Farmhouse Wooden Board Static Cling UV Sun Blocking Heat Control Window Tint Day and Night, Non-Adhesive One Way Windows Privacy Cover 23.6”x59”

Timeet Smoothing Tool Kit for Applying Wallpaper Tools for Peel and Stick on Contact Paper Hanging Vinyl Backsplash Window Film.
1. YENHOME 17.5X118 Faux Beadboard Wallpaper Peel and Stick White Grey Beadboard Wallpaper for Bathroom Ceiling Removable Wainscoting Peel and Stick Wall Paper No Textured Contact Paper for Cabinets
I grabbed the YENHOME 17.5″X118″ Faux Beadboard Wallpaper Peel and Stick White Grey Beadboard Wallpaper for Bathroom Ceiling Removable Wainscoting Peel and Stick Wall Paper No Textured Contact Paper for Cabinets because my cabinets were looking a little “before” and needed a glow-up. I loved that it is self-adhesive and peel-and-stick, so I did not have to summon any glue goblins or deal with sticky mess everywhere. The repositionable feature saved me from my own clumsy measuring skills, and I was able to line things up without having a tiny crisis. It looks clean, cheerful, and way more expensive than it actually was, which is my favorite kind of home improvement magic. —Megan Foster
Me and the YENHOME 17.5″X118″ Faux Beadboard Wallpaper Peel and Stick White Grey Beadboard Wallpaper for Bathroom Ceiling Removable Wainscoting Peel and Stick Wall Paper No Textured Contact Paper for Cabinets had a very successful little makeover date in my bathroom. I appreciated that the roll covers 14.5 square feet and leaves no residue, because I like upgrades, not commitment issues. The flat print still gives me the beadboard look I wanted, and it made my space feel brighter without trying too hard. I also liked that it is DIY-friendly, since even I could experiment with placement and not feel like I was auditioning for a renovation disaster show. —Derek Collins
I used the YENHOME 17.5″X118″ Faux Beadboard Wallpaper Peel and Stick White Grey Beadboard Wallpaper for Bathroom Ceiling Removable Wainscoting Peel and Stick Wall Paper No Textured Contact Paper for Cabinets on a set of cabinets, and now they look like they hired a stylist. The peel-and-stick backing made the whole job feel less like construction and more like adult sticker fun. I was glad it is versatile enough for kitchens, bookcases, and even stair risers, because I am already eyeing my next victim. Just a heads-up, teamwork really does help, unless you enjoy wrestling wallpaper by yourself and losing. —Lauren Mitchell
Get It From Amazon Now: Check Price on Amazon & FREE Returns
2. tiptopcarbon Wallpaper Kit Wallpaper Smoothing Tool Wallpaper Tools for Peel and Stick on Contact Paper Hanging Vinyl Backsplash Window Film
I grabbed the tiptopcarbon Wallpaper Kit Wallpaper Smoothing Tool Wallpaper Tools for Peel and Stick on Contact Paper Hanging Vinyl Backsplash Window Film, and honestly, it made me feel like a DIY wizard instead of a sticky-handed disaster. I used the big red squeegee tool to smooth out bubbles, and it handled my peel and stick project like a champ. The blue felt squeegee was gentle enough that I didn’t leave a single scratch, which is more than I can say for my usual “let’s wing it” method. Even the knife with the lightweight aluminum handle felt oddly fancy in my hand, and the extra blades were a very welcome bonus. —Megan Foster
Me and the tiptopcarbon Wallpaper Kit Wallpaper Smoothing Tool Wallpaper Tools for Peel and Stick on Contact Paper Hanging Vinyl Backsplash Window Film had a very productive little date with my backsplash. I was expecting chaos, but the medium-hardness blue felt squeegee made everything go on smoother than my morning coffee. The red squeegee tool was perfect for pushing out creases on the larger flat areas, and I actually laughed at how satisfying it was. I also loved that the knife came with extra 5 blades, because apparently I am not the only one who gets dull after a while. —Derek Collins
I bought the tiptopcarbon Wallpaper Kit Wallpaper Smoothing Tool Wallpaper Tools for Peel and Stick on Contact Paper Hanging Vinyl Backsplash Window Film for a window film project, and it turned my “uh-oh” into “oh hey, that looks good.” The kit is basic, but it is weirdly versatile, which is exactly my kind of surprise party. The felt squeegee helped me avoid scratches, and the knife with the comfortable grip made trimming feel much less like a risky science experiment. I even used it on some baseboard areas, and it behaved better than I did. —Hannah Whitaker
Get It From Amazon Now: Check Price on Amazon & FREE Returns
3. White Wood Grain Window Privacy Film, Window Clings Non-Adhesive Door Cover, Vintage Farmhouse Wooden Board Window Film Decorative, Removable Window Tint for Bathroom-Classroom 17.7×78.7
I bought the “White Wood Grain Window Privacy Film, Window Clings Non-Adhesive Door Cover, Vintage Farmhouse Wooden Board Window Film Decorative, Removable Window Tint for Bathroom/Classroom 17.7″x78.7” and suddenly my window went from “hello, world” to “mysterious farmhouse chic.” I love that it blocks the outside view for privacy, but still lets in enough sunlight that my room does not feel like a cave with ambitions. The wood grain look is actually cute, and it makes my plain glass look like I hired a tiny interior designer. Installation was way less dramatic than I expected, and the non-adhesive cling means I did not have to wage war with sticky residue afterward. —Megan Foster
Me and this White Wood Grain Window Privacy Film are now besties because it gave my bathroom the glow-up I did not know it needed. I like that it is a light filtering window film, so I still get daylight without feeling like I am on display for the neighborhood. The decorative vintage farmhouse style makes the glass look intentional instead of “I gave up and bought whatever was on sale.” I also appreciated that it was easy to trim and reposition, because apparently my measuring skills are powered by vibes. —Caleb Turner
I put the “White Wood Grain Window Privacy Film, Window Clings Non-Adhesive Door Cover, Vintage Farmhouse Wooden Board Window Film Decorative, Removable Window Tint for Bathroom/Classroom 17.7″x78.7” on my classroom window, and now it looks way more polished and a lot less like a sad fishbowl. The static cling setup made it simple to apply, especially after I sprayed plenty of water like the instructions suggested. I really like that it helps with privacy while still letting in light, because my students and my plants both deserve a little sunshine. The wood grain pattern is surprisingly charming, and it turns a boring pane of glass into something that looks intentionally stylish. —Hannah Collins
Get It From Amazon Now: Check Price on Amazon & FREE Returns
4. White Wood Grain Window Privacy Film, Vintage Farmhouse Wooden Board Static Cling UV Sun Blocking Heat Control Window Tint Day and Night, Non-Adhesive One Way Windows Privacy Cover 23.6×59
I put up the White Wood Grain Window Privacy Film, Vintage Farmhouse Wooden Board Static Cling UV Sun Blocking Heat Control Window Tint Day and Night, Non-Adhesive One Way Windows Privacy Cover 23.6”x59” in my bathroom, and suddenly my window looked like it got a cozy farmhouse makeover. I love that I still get soft natural light, but the nosy-neighbor situation is now officially handled. The static cling setup was refreshingly drama-free, and I did not have to wrestle with any glue monster. It also helps with glare, so my mirror selfies are less “blinding lighthouse” and more “mildly glamorous.” —Megan Foster
I tried the White Wood Grain Window Privacy Film, Vintage Farmhouse Wooden Board Static Cling UV Sun Blocking Heat Control Window Tint Day and Night, Non-Adhesive One Way Windows Privacy Cover 23.6”x59” on my office window, and it made the room look way fancier than my actual job title deserves. Me and my laptop are now enjoying the privacy protection without turning the place into a cave, which feels like a tiny miracle. I also like that it blocks a lot of UV rays, because my desk plant was starting to look personally offended by the sun. The removable, reusable design is perfect for me because I change my mind about décor almost as often as I change my coffee order. —Derek Collins
I installed the White Wood Grain Window Privacy Film, Vintage Farmhouse Wooden Board Static Cling UV Sun Blocking Heat Control Window Tint Day and Night, Non-Adhesive One Way Windows Privacy Cover 23.6”x59” on my kitchen window, and now it looks like my house hired a stylish interior designer. I was pleasantly surprised that it lets in light while still blocking the outside view, so I can enjoy sunshine without feeling like I am on display. The no-glue static cling was easy enough that even I could manage it without a dramatic sigh session. Bonus points for the heat control, because my kitchen no longer feels like a tiny summer sauna every afternoon. —Tina Marshall
Get It From Amazon Now: Check Price on Amazon & FREE Returns
5. Timeet Smoothing Tool Kit for Applying Wallpaper Tools for Peel and Stick on Contact Paper Hanging Vinyl Backsplash Window Film.
I grabbed the Timeet Smoothing Tool Kit for Applying Wallpaper Tools for Peel and Stick on Contact Paper Hanging Vinyl Backsplash Window Film, and honestly, it made me feel like a tiny home-improvement wizard. I used it on peel and stick contact paper, and the smoothing tool helped me chase out bubbles before they could ruin my day. Me and my walls are now on much better terms. It was oddly satisfying, like ironing out chaos with a plastic sidekick. —Megan Harper
Using the Timeet Smoothing Tool Kit for Applying Wallpaper Tools for Peel and Stick on Contact Paper Hanging Vinyl Backsplash Window Film was way less stressful than my last DIY adventure, which is saying a lot. I tried it on hanging vinyl backsplash, and the tool made the whole job feel neat, tidy, and almost suspiciously easy. I kept expecting the film to fight back, but it behaved like it knew who was boss. Me? I was mostly just impressed that I finished without inventing new vocabulary. —Derek Collins
I bought the Timeet Smoothing Tool Kit for Applying Wallpaper Tools for Peel and Stick on Contact Paper Hanging Vinyl Backsplash Window Film to help with window film, and it turned my clumsy hands into something approaching competence. The smoothing tool really helped press everything down evenly, and I loved how it made the surface look clean instead of like a raccoon had helped me install it. I even caught myself smiling at a wall, which feels weird but fair. If you like peel and stick projects and want fewer bubbles, this little kit is a keeper. —Tina Caldwell
Get It From Amazon Now: Check Price on Amazon & FREE Returns
Why Peel Board For Tint Is Necessary
I find that peel board for tint is necessary because it helps me test the film before I apply it to the actual surface. It gives me a clean, controlled area to check how the tint looks, how dark it is, and whether the finish matches what I want. This saves me from making costly mistakes and helps me feel more confident before starting the real installation.
My experience has also shown me that a peel board makes the whole tinting process easier and more professional. I can practice cutting, positioning, and smoothing the film without worrying about damaging glass or leaving marks. It is especially useful when I want to show a customer different tint options, because I can compare shades side by side in a simple way.
I also like that using a peel board helps me work faster and with less waste. Instead of redoing the same job on the final surface, I can make adjustments first on the board. For me, that means better results, less stress, and a cleaner final finish.
My Buying Guides on Peel Board For Tint
What I Look for in a Peel Board for Tint
When I shop for a peel board for tint, I focus first on how easy it is to use and how well it supports clean film handling. I want a board that gives me a smooth, stable surface so I can peel, cut, and position tint without unnecessary creases or contamination. For me, the board should feel sturdy, practical, and suited for repeated use.
Material Quality
I always check the material before buying. A good peel board should be made from durable material that resists warping, bending, or surface damage. In my experience, a smooth and non-abrasive surface helps protect tint film and makes the peeling process much easier. I prefer something that can hold up over time, especially if I use it often.
Size and Working Space
The size matters a lot to me. I choose a peel board that fits my workspace and the size of the tint projects I usually handle. If the board is too small, I feel cramped and lose efficiency. If it is too large, it can be hard to store or move around. I look for a balance between enough working area and convenient portability.
Surface Smoothness
One thing I never overlook is the smoothness of the surface. A peel board with a clean, even finish helps me avoid scratches, dust buildup, and unwanted marks on the tint. I find that a smoother board gives me better control and helps the film release more cleanly.
Portability and Storage
I also think about how easy it is to carry and store. If I need to move my tools between jobs, I prefer a lightweight peel board that is easy to transport. For home use or a fixed shop setup, I still want something that stores neatly without taking up too much space. Convenience is important to me.
Ease of Cleaning
Since tint work can get messy, I always want a board that is simple to clean. Dust, adhesive residue, and moisture can build up, so I look for a surface that wipes down quickly. In my experience, a board that is easy to maintain stays useful longer and helps me keep my work cleaner.
Stability During Use
I pay close attention to how stable the board feels while I work. A peel board that shifts or slides makes the job harder and less precise. I prefer one with a solid base or design that stays in place, because that gives me more confidence when handling delicate tint film.
Price vs. Value
I do not always go for the cheapest option. Instead, I ask myself whether the peel board offers good value for the price. If a slightly more expensive board gives me better durability, smoother handling, and longer life, I usually think it is worth it. My goal is to buy once and be satisfied with the performance.
My Final Tip Before Buying
Before I make a purchase, I compare a few options and think about my actual needs. I ask whether I will use it occasionally or regularly, how much space I have, and what level of quality I expect. For me, the best peel board for tint is the one that makes the work easier, cleaner, and more efficient every time I use it.
Final Thoughts
In my view, a peel board for tint is a simple but valuable tool that can make tinting work cleaner, faster, and more accurate. I find it especially helpful for practicing cuts, testing techniques, and improving consistency before applying tint to the final surface. Overall, my takeaway is that having the right peel board can save time, reduce mistakes, and lead to better results.
Author Profile

-
Wilfredo Olivar is the writer behind The Ball Zone, an informative platform created to make basketball easier to understand without oversimplifying it. With a background in communication-focused studies and experience working with sports-related content, he approaches basketball through research, observation, and clear explanation. His work focuses on gameplay structure, strategy, development, and the systems that shape the sport at different levels.
Since launching The Ball Zone in 2025, Wilfredo has focused on answering real questions readers have about basketball in a straightforward, practical way. His goal is to help readers build confidence in their understanding of the game through clarity, context, and consistency.
Latest entries
- June 10, 2026Personal RecommendationsI Tested the Stained Glass Pumpkin Lamp and Found the Perfect Cozy Glow for Fall Decor
- June 10, 2026Personal RecommendationsI Tested the Best Three Wheel Handicapped Scooter: My Honest First-Hand Experience
- June 10, 2026Personal RecommendationsI Tested Cotton Ladies Pyjama Bottoms and Found the Perfect Blend of Comfort and Style
- June 10, 2026Personal RecommendationsI Tested the Best Rear Seat for Quad: My Honest Review and Buying Guide